

Building the "real" iOS Navigation Bar in Flutter

When I started using flutter, one of the biggest challenges I faced was creating experiences for iOS users that felt native. In this post, I'll explain how to create a navigation bar like the one Apple uses in most of its apps. The picture below shows the animation we want to achieve. It's taken from the Apple Music iOS app.
Creating a Cupertino App
The first thing you'll want to do after creating a new flutter project is to get rid of the existing Material App and create a Cupertino App. I then added some TextTheme settings to better suit the look we're going for.
return CupertinoApp(
      title: 'iOS Navbar Demo',
      theme: CupertinoThemeData(
          primaryColor: Colors.black,
          scaffoldBackgroundColor: Colors.white,
          barBackgroundColor: Colors.white,
          textTheme: CupertinoTextThemeData(
            navTitleTextStyle: TextStyle(
                fontSize: 17, color: Colors.black, fontWeight: FontWeight.w700),
            navLargeTitleTextStyle: TextStyle(
                fontSize: 34, color: Colors.black, fontWeight: FontWeight.w700),
          )),
      home: MyHomePage(),
    );
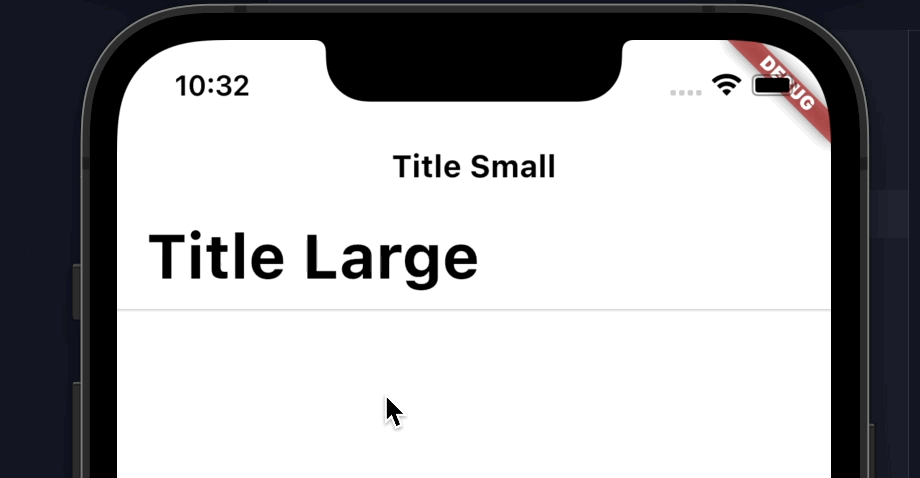
Now we are going to create a CupertinoPageScaffold that contains the default CupertinoSliverNavigationBar.
return CupertinoPageScaffold(
        backgroundColor: Colors.white,
        child: CustomScrollView(slivers: [
          CupertinoSliverNavigationBar(
            stretch: true,
            middle: Text("Title Small"),
            largeTitle: Text("Title Large"),
          )
        ]));
The result from the default Navigation Bar looks a bit underwhelming though.
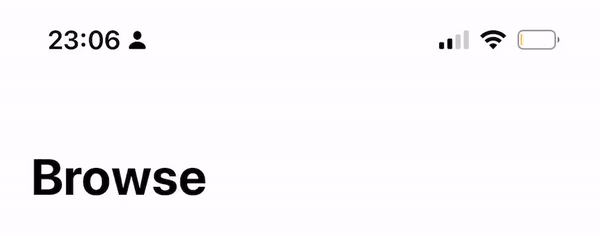
To get the look we're going for, we show and hide the smaller title in the nav bar depending on the visibility of the larger title. We can achieve this by using the Visibility Detector package.
flutter pub add visibility_detector
Ok, now that we've added the package we need to do a few more things. We need to add some variables to track the visibility and set the update interval. If we set the update interval to zero, it'll give us the best results.
  bool showSmallTitle = false;
  double visibility = 0.0;

  @override
  void initState() {
    VisibilityDetectorController.instance.updateInterval = Duration.zero;
    super.initState();
  }
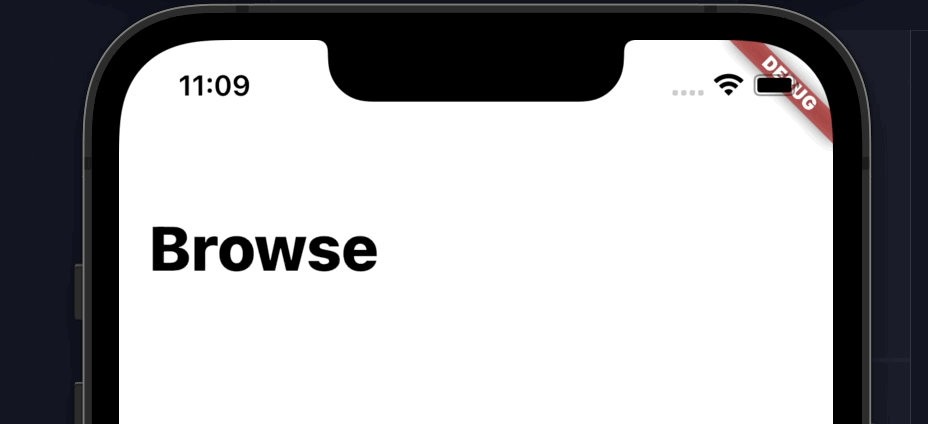
Now we use the variables to change the visibility of the smaller title and slowly fade in the background color and border of the navigation bar.
CupertinoSliverNavigationBar(
  stretch: true,
  backgroundColor: Colors.grey.shade100.withOpacity(visibility),
  middle: visibility > 0.9 ? const Text("Browse") : const Text(""),
  largeTitle: VisibilityDetector(
    key: const Key('nav-container'),
    onVisibilityChanged: (VisibilityInfo info) {
      setState(() {
        visibility = 1 - info.visibleFraction;
      });
      if (info.visibleFraction > 0) {
        setState(() {
          showSmallTitle = false;
        });
      } else {
        setState(() {
          showSmallTitle = true;
        });
      }
    },
    child: const Text("Browse"),
  ),
  border: Border(
      bottom: BorderSide(
    width: 1,
    color: Colors.grey.shade300.withOpacity(visibility),
  )),
)
I think the result speaks for itself.
Thanks for reading and check out the GitHub repository for more details.